Automated screenshots in Flutter (without pain)
For me, screenshots of apps was always a painful theme. I think we’ve all been there: You find an absolutely perfect tool, it’s simple and minimalistic (judging by screenshots from its website). You download it, open it, and it looks completely different. It’s a little bit disappointing.
Pre-made libraries and other ways
I’m building my app with Flutter called sudoku. Just before the first release I found out that I have no screenshots for my app. I had two options to make them:
- By hand
- Using some kind of script
My app grows quickly and interface changes fast, which means that screenshotting by hand is dumb idea. So I started looking into how I can implement automated screenshots. I, again, had many options:
- This article. It is very complex in my opinion, and, I need simple plain screenshots without any text on them. Plus there is no source code available.
auto_screenshotlibrary, which is working only if app uses deep-linking (link)screenshotslibrary, which is Dart 3 incompatible (link)- … and many more I forgot to list here
As you can see, I did not quite like any of these approaches. So, I tried to create my own.
My solution
My solution uses only flutter_test and integration_test. That’s all! Here is
a repo where you can find everything mentioned in this
guide.
Step 1. Adding dependencies
Go to your project and open pubspec.yaml. Find a line that says
dev_dependencies. Add this lines somewhere at the bottom:
| |
Run flutter pub get.
Step 2. Create test file
Inside your project, create a folder called integration_test. Inside it, create
file named as you wish, but with _test.dart on the end. Mine is named
screenshots_test.dart. Inside this file, insert following lines:
| |
Step 3. Write tests
At this step, our actions might be different, depending on the structure of your app. But I will
show you, how to do screenshots with standard app, which flutter create somename produces.
I have this function, called makeScreenshot, here is what it does:
| |
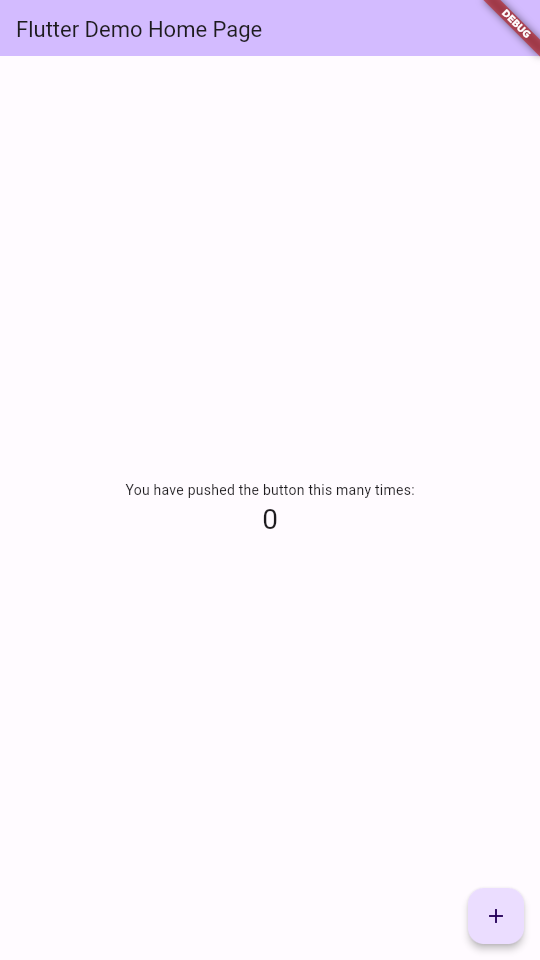
With this function I can create some nice-looking screenshots of my default app.
At the end of main function I inserted this:
| |
Then I run flutter test integration_test --update-goldens. And there I have
it! Screenshot of default page located at
integration_test/screenshots/default_page.png.
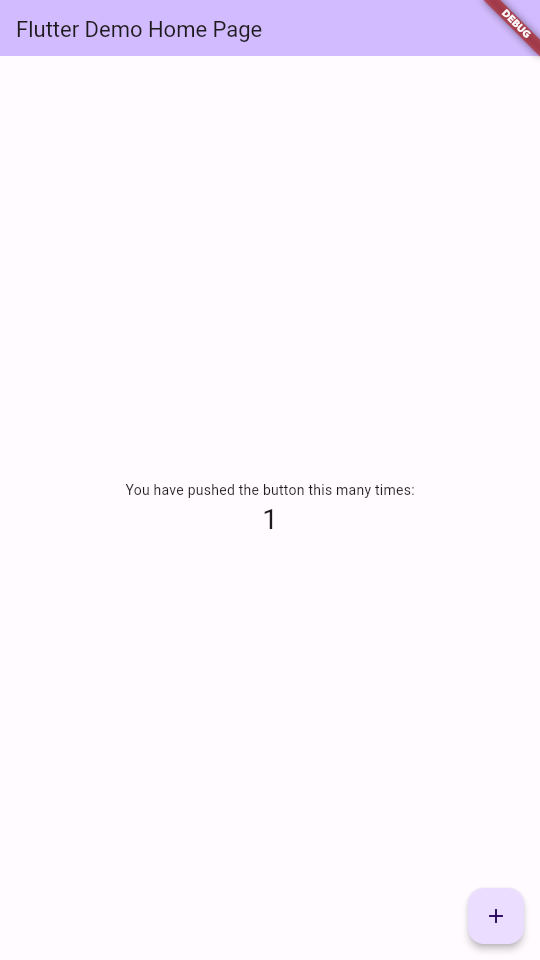
“But that’s boring”, you might say, “What if I need to click on some buttons or do something else
before screenshot is taken?” I got you, that is easy too! Let’s say that we have
a button with an add icon on this page, and we want to tap on it. Just add
another makeScreenshot call below the first one and modify it a bit.
| |
find and tester have other useful methods. You can find them in the
documentation, both for
find
and tester.
Run flutter test integration_test --update-goldens again, and there you have
it, another screenshot.
Ending

That’s it for now! Again, you can find everything I did here in this GitHub repo. Also, here is an example of how I do it in my project.